Tour
This demonstration will give you some idea of the power and versatility of Keyboard Maestro.
Getting Started
To start, launch Keyboard Maestro and it will display the Macros window pane.
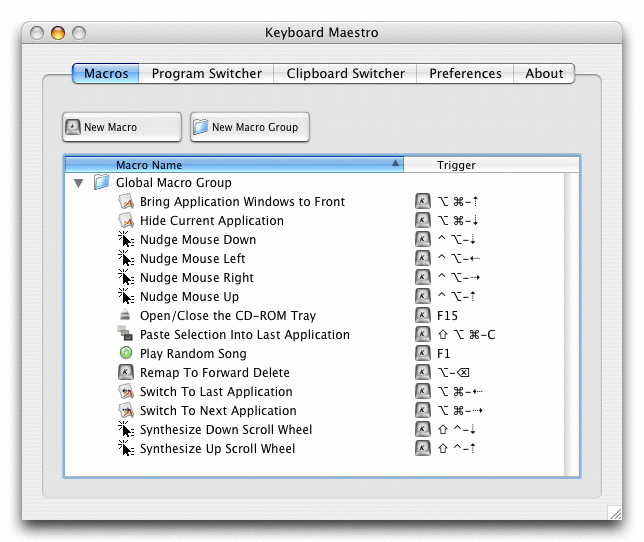
You can see some example Macros we have included for you.
Make New Macro
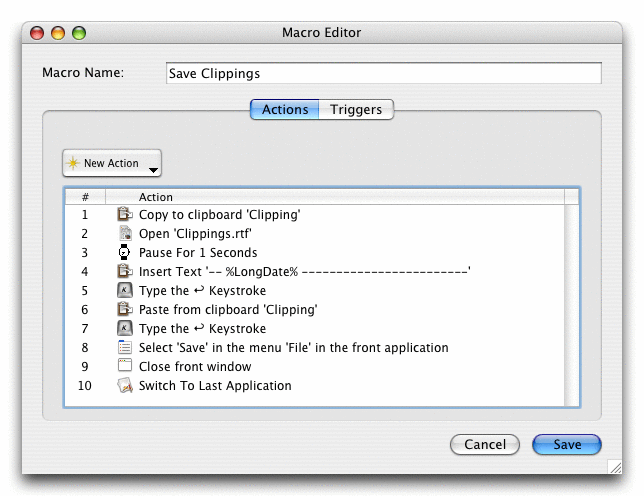
Click the button to display the Macro Editor window. We will now design quite a complex Macro that will allow you to save clippings to a text file. First, launch TextEdit and create a new empty document and save it to Clippings.rtf in your Documents folder.
Now to add a selection to the Clippings file, you would normally do this:
- Press Command-C to copy the selection.
- Open your Documents folder and then open the Clippings.rtf file.
- Press Command-V to paste the clipping.
- Press return and type a line of dashes and return to separate the clippings.
- Close the window and save the file.
- Switch back to wherever you were before.
That is all very tedious, and probably explains why you do not bother doing it!
So lets define the whole sequence as a Macro.
Now switch to the Trigger pane and define a Hot Key, say F2 (by default, F1 is defined to play a random song in iTunes, so you will have to disable that if you want to use F1).
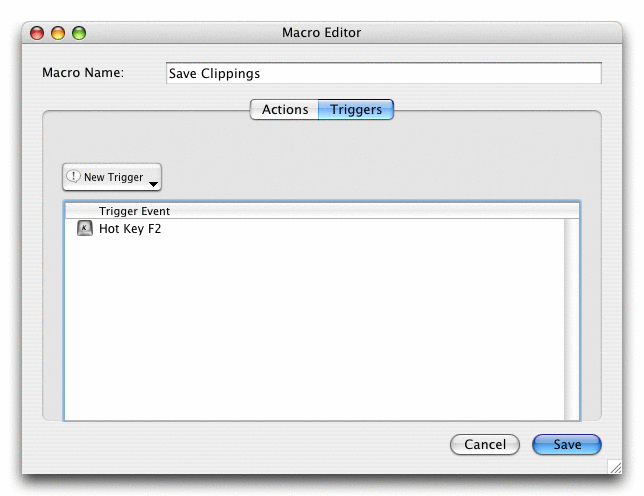
Save the Macro and now any time you have some text you want to save, just select it and press F2!
Named Clipboards
If you were paying attention, you might have noticed that rather than just copy the selection using Command-C, we actually copied it to the named clipboard “Clipping”. Keyboard Maestro lets you create as many named clipboards as you want using the Clipboard Switcher window pane.
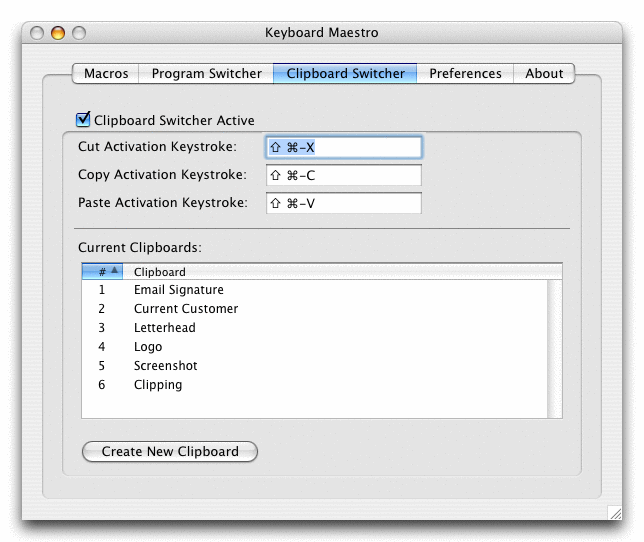
and then you can cut, copy or paste from them using the defined Hot Keys (by default, Command-Shift X, C and V respectively).
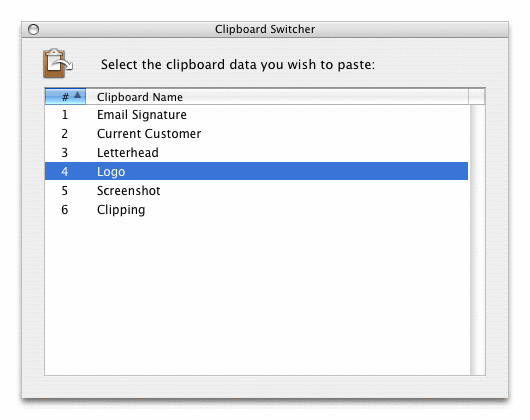
You can save frequently used information like your copy logo in named clipboards and then paste them whenever you want, or use a named clipboard to store current information, like the current customer or project and paste it in as required.
Program Switcher
At the end of the Macro we defined, we used the Switch To Last Application action to switch back to the program you were using before. Of course, most people use a lot more than one program and need to be able to switch between them. Keyboard Maestro not only lets you switch between applications, but also lets you define Fast Launch Applications applications that always appear when you are switching so you can launch them quickly, and also Excluded Applications that never appear. As well, you can quit, hide or show applications. You can configure the Program Switcher in the Program Switcher window pane.
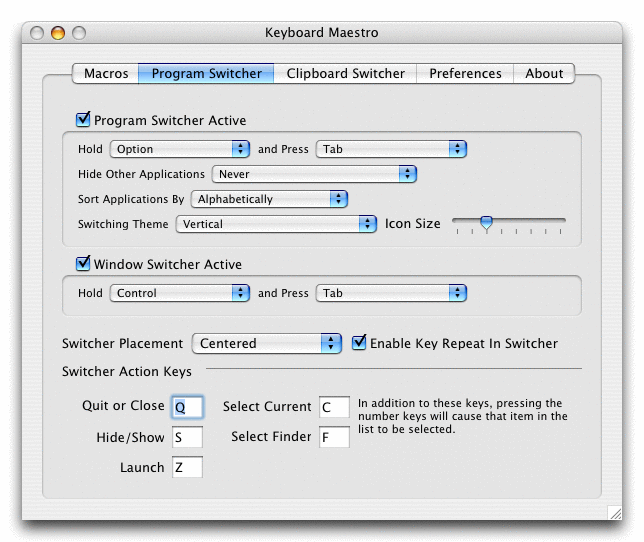
By holding down the Program Switcher modifier and pressing the activation key (for example, Option-Tab), the Program Switcher window appears.
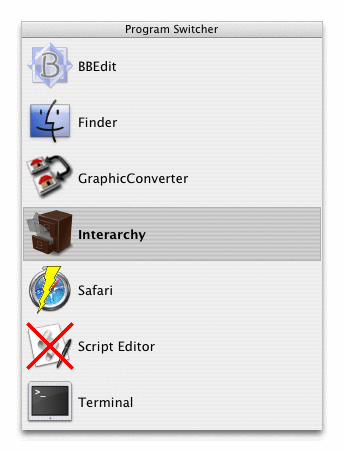
Note the applications set to be launched or quit. If you want to be able to launch a specific program with a key press, you can define a Macro to do that and assign a Hot Key Macro Trigger such as F3.
By holding down the Window Switcher modifier and pressing the activation key (for example, Control-Tab), the Window Switcher window appears showing the windows in the current application.
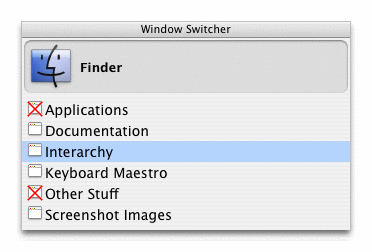
Note the windows set to be closed. This is a very useful way of cleaning up an application with a lot of open windows, especially prevalent in the Finder.
Conduct Your Mac Like a Pro!
This is just a taste of what Keyboard Maestro can do for you. Isn’t it time you started getting the most from your Mac? Download Keyboard Maestro today and you can be working faster and smarter in no time.
