![]() Keyboard Maestro
Keyboard Maestro
Conduct your Mac Like a Pro!
![]() Keyboard Maestro
Keyboard Maestro
Conduct your Mac Like a Pro!
This window pane lets you manipulate Macros and Macro Groups, creating new ones, deleting old ones, enabling and disabling them and so on.
You get this window pane by launching Keyboard Maestro and clicking the Macros tab.
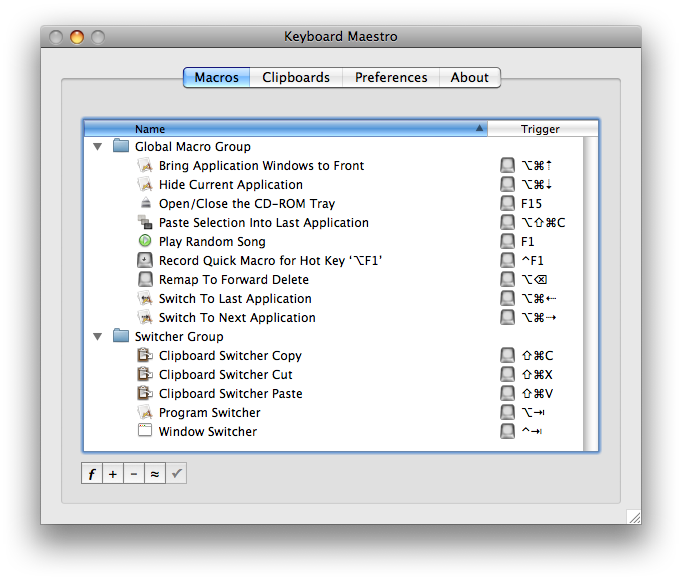
The window pane contains a list of Macro Groups and their associated Macros.
You can create a new Macro Group by clicking the button. A Macro Group Editor sheet will appear allowing you to enter the Macro Group’s details.
You can create a new Macro by clicking the button. A Macro Editor window will appear and allow you to define your new Macro. The new Macro will be created in the currently selected Macro Group or the Global Macro Group if no item is selected.
You can change an entry (Macro or Macro Group) by double clicking it. You can rename an entry by clicking the button. You can delete an entry by clicking the button or pressing the Delete key.
To delete a Macro Group, you must either select it and all the enclosed macros, or close (collapse) the group and then select it.
You cannot delete, rename or modify the Global Macro Group.
See also the Macros and Macro Editor Window sections.
This sheet allows you to enter the name of the group, choose the applications in which the group’s Macros should be active, and how the macros will be activated or displayed.
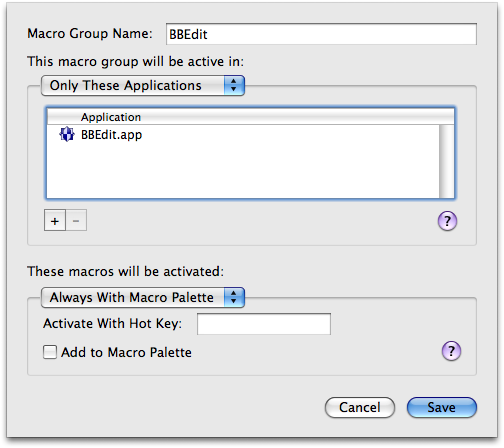
Typically a group’s macros would be active everywhere (All Applications), or it might be specific to a particular application (Only These Applications) in which case you might name the Macro Group after the application.
You can also configure the macro group to be activated only after a Hot Key press (either for a single use or toggled on and off), and whether to display the macros in a floating palette.
See also the Macros section.
This window lets you create or edit a Macro.
You get this window by selecting the Macros window pane and either clicking the button to create a new Macro or by double clicking an existing Macro to edit it.
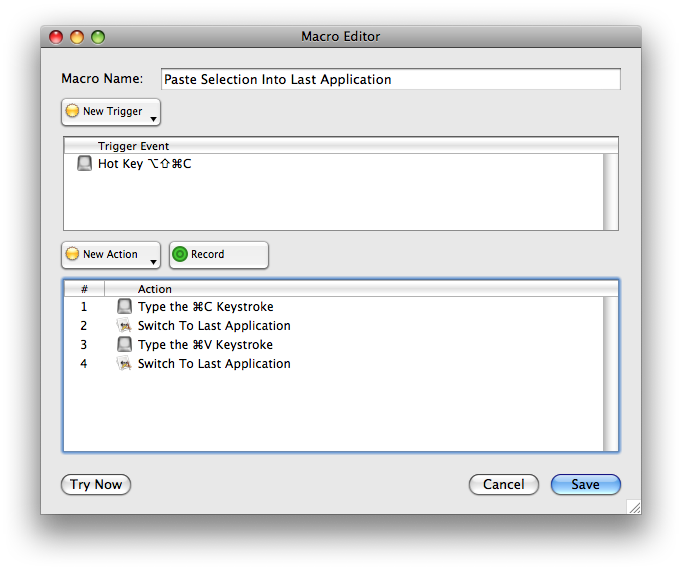
You can give the Macro a name, add, delete or rearrange actions, and add or delete triggers.
You can click the button to record your actions, or click the button to try out the macro actions.
To learn more about creating or editing Macros, see the Macros section.
This window shows you when Keyboard Maestro is recording your actions.
You get this window by clicking the button in the Macro Editor window or by triggering a Record Quick Macro action.

Clicking on this window will stop all recording.
To learn more about recording, see the Recording section.
This window lets you switch between active programs, as well as quit or hide programs or quickly launch frequently used programs.
You get this window by triggering the Program Switcher macro.
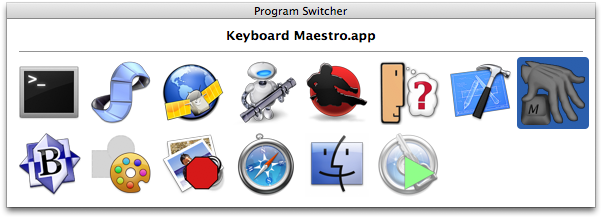
To learn more about the Program Switcher, see the Program Switcher section.
This window lets you switch between windows in the current application, as well as close or minimize windows.
You get this window by triggering the Window Switcher macro.
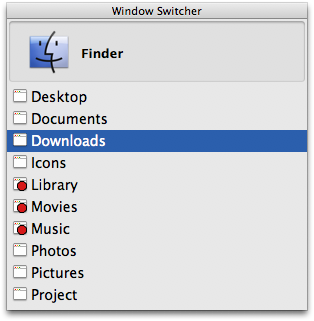
To learn more about the Window Switcher, see the Window Switcher section.
This window pane lets you create or delete named Clipboards.
You get this window pane by launching Keyboard Maestro and clicking the Clipboards tab.
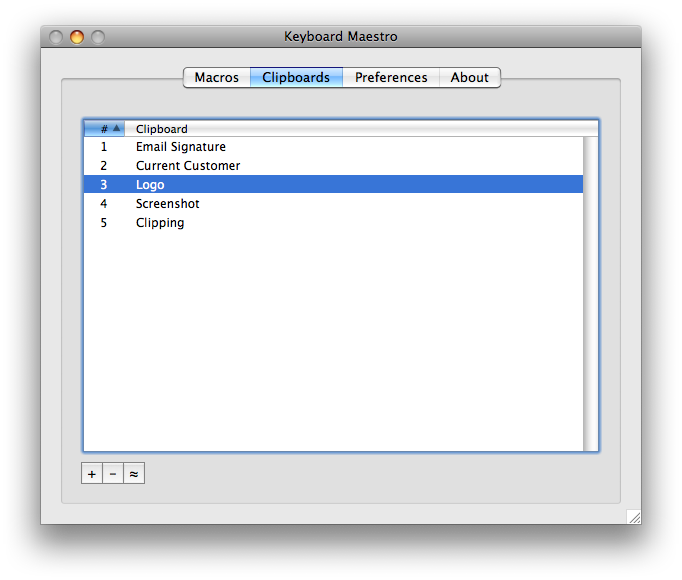
To learn more about the Clipboard Switcher, see the Clipboard Switcher section.
This window lets you select between named clipboards to Cut, Copy or Paste to/from.
You get this window by triggering one of the Clipboard Switcher macros.
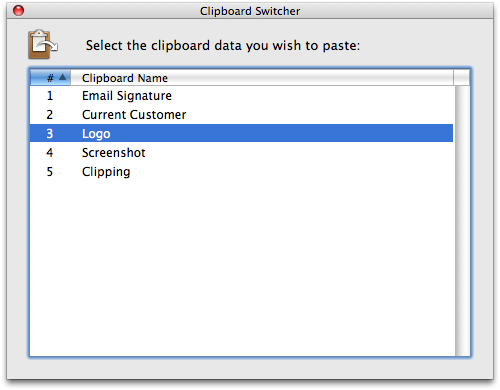
To learn more about the Clipboard Switcher, see the Clipboard Switcher section.
This window lets you paste from your clipboard history of items that you have previously cut or copied.
You get this window by triggering the Clipboard History Switcher macro.

To learn more about the Clipboard History Switcher, see the Clipboard History Switcher section.
This window pane lets you configure Keyboard Maestro.
You get this window pane by launching Keyboard Maestro and clicking the Preferences tab.

To learn more about the Preferences, see the Preferences section.
This window shows you the version of this copy of Keyboard Maestro, to whom it is registered, and allows you to visit the web site.
You get this window by launching Keyboard Maestro and clicking the About tab.
